- Displaying Google Map.
- Change the type of Google Maps.
- Add markers to Google Maps.
1. Creating the Project in Android Studio
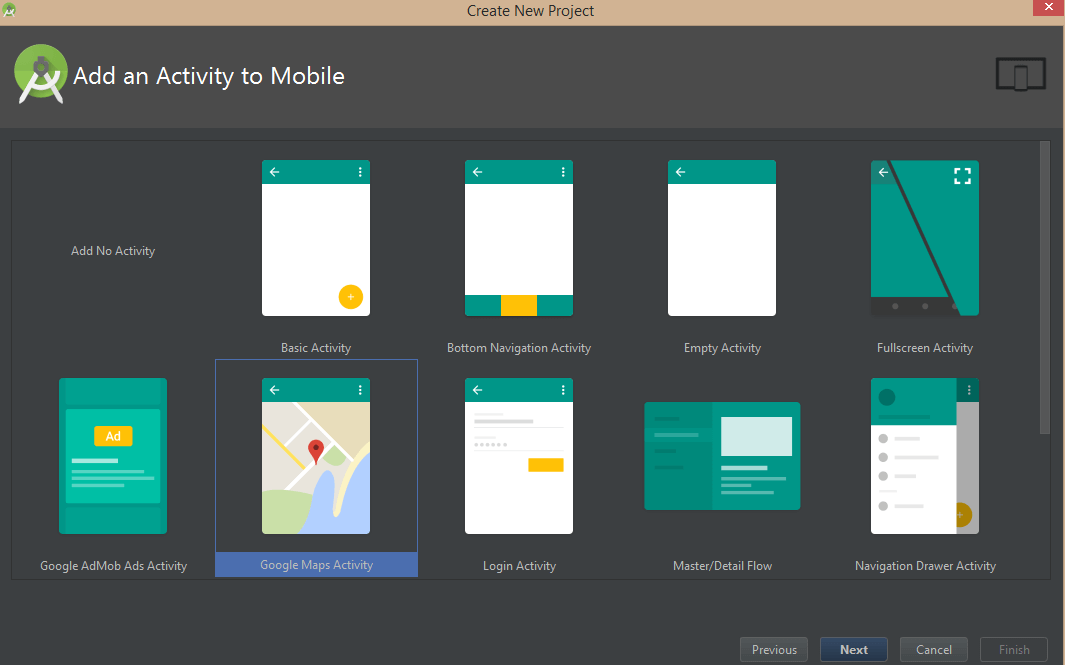
To get started, we need to create an Android project and select Google maps activity.

2. Steps for getting the Google Map API key:
Step 1: Copy the URL from the google_map_api.xml file to generate a Google map API key.
Step 2: When we paste the URL in the browser, it will open the page. Then click CONTINUE => Create API key. The API Key will be generated.
Step 3: Copy this API key to the
3. Example to Access Google Maps in Android Studio:
We need to modify AndroidManifest.xml file by adding some user permission like:
1)INTERNET: To determine if we are connected to the internet or not.
2)ACCESS_FINE_LOCATION: To determine a user's location using GPS.
3)ACCESS_COARSE_LOCATION: To determine user"s location using Wi-Fi and mobile data.
AndroidManifext.xml
activity_maps.xml
We are going to implement the android MapView in a Fragment and subsequently add the Fragment to the MainActivity class.
MapsActivity.java
In MapsActivity.java class to get the Google map object, we need to implement the OnMapReadyCallback interface and override the onMapReady() callback method, these are called when the map is ready to be used.
Changing the Map Type: There are four different types of map Normal, Hybrid, Satellite, and terrain. We can use them as below:
MAP_TYPE_NORMAL : The map includes a road map with street names and labels.
MAP_TYPE_SATELLITE: This type of map has a Satellite View without street names and labels.
MAP_TYPE_TERRAIN: The map includes colors, lines, and labels. Some roads and labels are also visible.
MAP_TYPE_HYBRID : This map type is the combination of a satellite View Area and Normal mode displaying satellite images of an area with all labels.
googleMap.setMapType(GoogleMap.MAP_TYPE_NORMAL);
googleMap.setMapType(GoogleMap.MAP_TYPE_HYBRID);
googleMap.setMapType(GoogleMap.MAP_TYPE_SATELLITE);
googleMap.setMapType(GoogleMap.MAP_TYPE_TERRAIN)
Zoom Controls: We can control Zooming gestures on the map by using built-in setZoomControlsEnabled() function. These can be enabled by calling:
googleMap.getUiSettings().setZoomGesturesEnabled(true); // false to disable
Add Marker on Map: We can place a marker to display location on the map by addMarker() method.
LatLng delhi= new LatLng(28.7,77.1);
mMap.addMarker(new MarkerOptions().position(delhi).title("Marker in Delhi"));
MapsActivity.java
package com.example.dell.displayinggooglemaps;import android.support.v4.app.FragmentActivity; import android.os.Bundle; import com.google.android.gms.maps.CameraUpdateFactory; import com.google.android.gms.maps.GoogleMap; import com.google.android.gms.maps.OnMapReadyCallback; import com.google.android.gms.maps.SupportMapFragment; import com.google.android.gms.maps.model.LatLng; import com.google.android.gms.maps.model.MarkerOptions; public class MapsActivity extends FragmentActivity implements OnMapReadyCallback { private GoogleMap mMap; @Override protected void onCreate(Bundle savedInstanceState) { super.onCreate(savedInstanceState); setContentView(R.layout.activity_maps); // Obtain the SupportMapFragment and get notified when the map is ready to be used. SupportMapFragment mapFragment = (SupportMapFragment) getSupportFragmentManager() .findFragmentById(R.id.map); mapFragment.getMapAsync(this); } @Override public void onMapReady(GoogleMap googleMap) { mMap = googleMap; LatLng delhi = new LatLng(28.7,77.1); mMap.addMarker(new MarkerOptions().position(delhi).title("Marker in Delhi")); mMap.moveCamera(CameraUpdateFactory.newLatLng(delhi)); } }
build.gradle
In the app build.gradle file, we will add a Map dependency library. The modified version of the file is as shown:
apply plugin: 'com.android.application'
android {
compileSdkVersion 26
buildToolsVersion "26.0.0"
defaultConfig {
applicationId "com.example.dell.displayinggooglemaps"
minSdkVersion 19
targetSdkVersion 26
versionCode 1
versionName "1.0"
testInstrumentationRunner "android.support.test.runner.AndroidJUnitRunner"
}
buildTypes {
release {
minifyEnabled false
proguardFiles getDefaultProguardFile('proguard-android.txt'), 'proguard-rules.pro'
}
}
}

dependencies {
compile fileTree(dir: 'libs', include: ['*.jar'])
androidTestCompile('com.android.support.test.espresso:espresso-core:2.2.2', {
exclude group: 'com.android.support', module: 'support-annotations'
})
compile 'com.android.support:appcompat-v7:26.+'
compile 'com.google.android.gms:play-services-maps:11.0.0'
testCompile 'junit:junit:4.12'
}
That’s all for accessing google maps in an android tutorial. Now if you run this demo, you will get the output as shown above.


