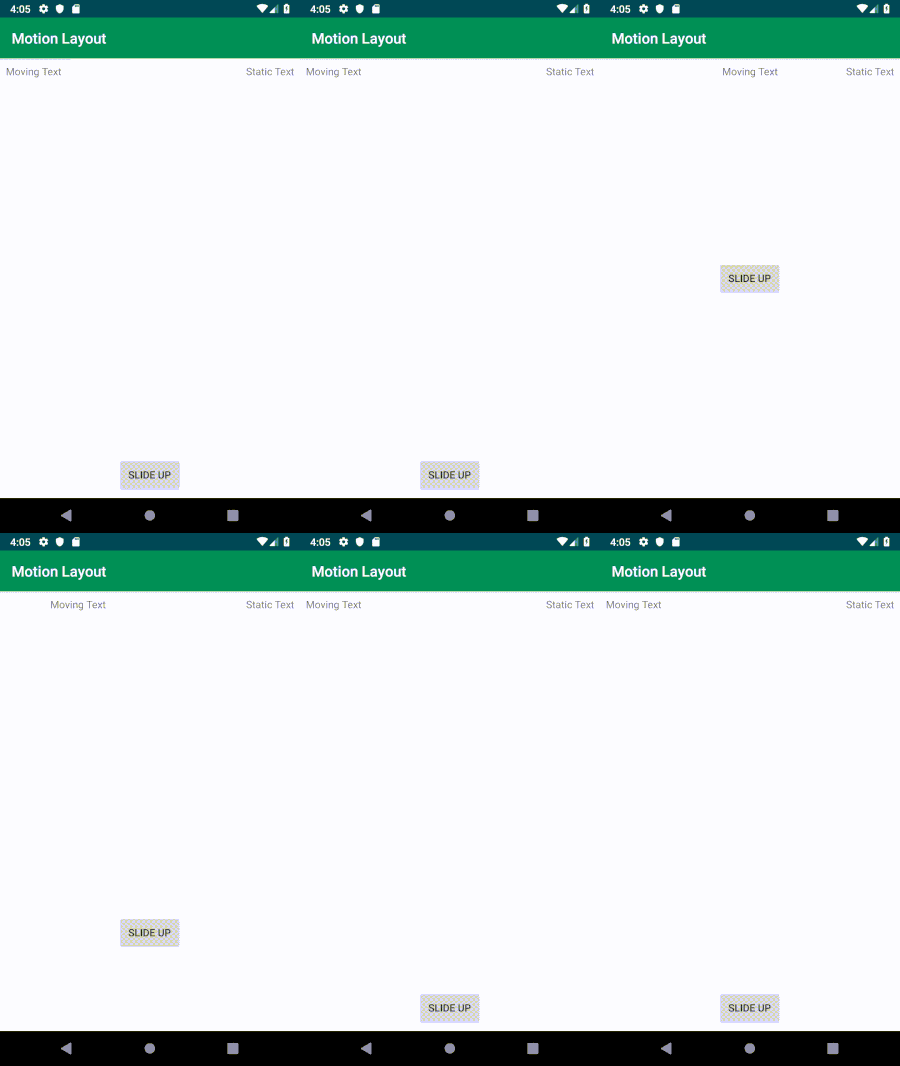
To have MotionLayout up and running in your project, and to get a feel of how it works, you’ll need
- A starting layout
- An ending layout that has the ending constraints
- And a motion scene (which defines our animation)
Prerequisites
- Basic knowledge of Android development
- Android Studio installed
- Familiarity with XML layouts and views

SlideUp Motion Layout Tutorial (Code)

Steps to Implement MotionLayout
Step 1: Add Dependency
First, add the required dependency in your app-level build.gradle file:
dependencies {
    implementation "androidx.constraintlayout:constraintlayout:2.0.0-beta6"
}
Step 2: Create the Starting Layout
Create an XML layout file activity_main.xml with three views: two of which we'll animate and one static.

xml version="1.0" encoding="utf-8"?>
<android.support.constraint.motion.MotionLayout
    xmlns:android="http://schemas.android.com/apk/res/android"
    xmlns:tools="http://schemas.android.com/tools"
    xmlns:app="http://schemas.android.com/apk/res-auto"
    android:layout_width="match_parent"
    android:layout_height="match_parent"
    app:layoutDescription="@xml/motion_scene"
    tools:context=".MainActivity">

    <TextView
        android:id="@+id/movingTextView"
        android:text="Moving Text"
        android:layout_width="wrap_content"
        android:layout_height="wrap_content"
        android:layout_marginTop="8dp"
        android:layout_marginStart="8dp"
        app:layout_constraintTop_toTopOf="parent"
        app:layout_constraintStart_toStartOf="parent"/>

    <Button
        android:id="@+id/button"
        android:text="Slide Up"
        android:layout_width="wrap_content"
        android:layout_height="wrap_content"
        android:layout_marginBottom="8dp"
        android:layout_marginStart="8dp"
        android:layout_marginEnd="8dp"
        app:layout_constraintBottom_toBottomOf="parent"
        app:layout_constraintEnd_toEndOf="parent"
        app:layout_constraintStart_toStartOf="parent"/>

    <TextView
        android:id="@+id/staticTextView"
        android:text="Static Text"
        android:layout_width="wrap_content"
        android:layout_height="wrap_content"
        android:layout_marginTop="8dp"
        android:layout_marginEnd="8dp"
        app:layout_constraintTop_toTopOf="parent"
        app:layout_constraintEnd_toEndOf="parent"/>
android.support.constraint.motion.MotionLayout>
Step 3: Create the Ending Layout
Next, create an ending layout activity_main_end.xml with the final constraints for the views you want to animate.

Also: You can see that I have used only one textView which I want to animate
xml version="1.0" encoding="utf-8"?>
<android.support.constraint.motion.MotionLayout
    xmlns:android="http://schemas.android.com/apk/res/android"
    xmlns:app="http://schemas.android.com/apk/res-auto"
    android:layout_width="match_parent"
    android:layout_height="match_parent">

    <TextView
        android:id="@+id/movingTextView"
        android:text="Moving Text"
        android:layout_width="wrap_content"
        android:layout_height="wrap_content"
        android:layout_marginTop="8dp"
        android:layout_marginStart="8dp"
        app:layout_constraintTop_toTopOf="parent"
        app:layout_constraintStart_toStartOf="parent"
        app:layout_constraintEnd_toEndOf="parent"/>

    <Button
        android:id="@+id/button"
        android:text="Slide Up"
        android:layout_width="wrap_content"
        android:layout_height="wrap_content"
        android:layout_marginBottom="8dp"
        android:layout_marginEnd="8dp"
        android:layout_marginStart="8dp"
        android:layout_marginTop="8dp"
        app:layout_constraintBottom_toBottomOf="parent"
        app:layout_constraintEnd_toEndOf="parent"
        app:layout_constraintStart_toStartOf="parent"
        app:layout_constraintTop_toTopOf="parent"/>
android.support.constraint.motion.MotionLayout>
Step 4: Create the Motion Scene
Define the motion/animation in a motion scene file motion_scene.xml located in res/xml/.
Note: Make this xml layout in res/xml/motion_scene.xml
xml version="1.0" encoding="utf-8"?>
<MotionScene xmlns:motion="http://schemas.android.com/apk/res-auto">
    <Transition
        motion:constraintSetStart="@layout/activity_main"
        motion:constraintSetEnd="@layout/activity_main_end"
        motion:duration="1000">

        <OnSwipe
            motion:touchAnchorId="@id/button"
            motion:touchAnchorSide="top"
            motion:dragDirection="dragUp"/>
    Transition>
MotionScene>
Explanation of Motion Scene Parts
Part A: Here we defined a Transition (the animation) with duration & a start/end pointing to the layouts.
Part B: Defines a swipe trigger on the button to add interactivity, specifically a drag-up gesture.
Final Note
Ensure that you add app:layoutDescription="@xml/motion_scene" to the MotionLayout in your activity_main.xmlfile to link the motion scene.
And that's it! You've now created a slide-up animation using MotionLayout in Android.


